Encrypted Backups -Moving all of your data to digital devices has left it vulnerable to all sorts of thefts. Over an internet connection, anyone from any place in the world can gain access to your sensitive data. This is why it’s important to be careful.
Securing and limiting access means figuring out a method that allows only you to access your sensitive data. Encryption helps convert your valuable data to a secret language. This secret language can only be understood by the person who holds the password. In this case, it’s you.
How to Perform Encrypted Backups on your iOS Devices?
Encryption in its most basic form works by scrambling and encoding the data into an unidentifiable format. The file can now only be brought back to its original form by entering the password set by the user.
Encrypting your data is the smartest way to make sure sensitive data is never compromised. In case of data that is backed up, users can rest easy knowing access is restricted to only them.
Securing your iOS Device
Smartphones today contain more access to user behavior than any other digital device. Moreover, most of our valuable data can be accessed through our phones. These can be our emails, social media accounts or any other related thing.
This is why it’s extremely important to take measures to protect data on our phones. It’s also important to choose a smartphone that has good security features. In this regard, your iPhone contains a strict encryption process.
Encrypted backups in your iOS device help restrict access to valuable data. The process works by first encrypting the data, and then creating a password. Now, only the device owner has access to the encryption password. If any outside party attempts to access this data, password protection would stop them.
With your iOS device, iTunes provides a method to protect this data through encryption. This can also help keep your files secure in the form of backups.
iCloud Backups and Encrypted iTunes Backups
First, it’s important to know why you should have a backup plan. It’s not only enough to consider your data can be lost by a hack. You can lose valuable data from any mishap. Such as, physical damage to your phone can cause the data to be lost forever.
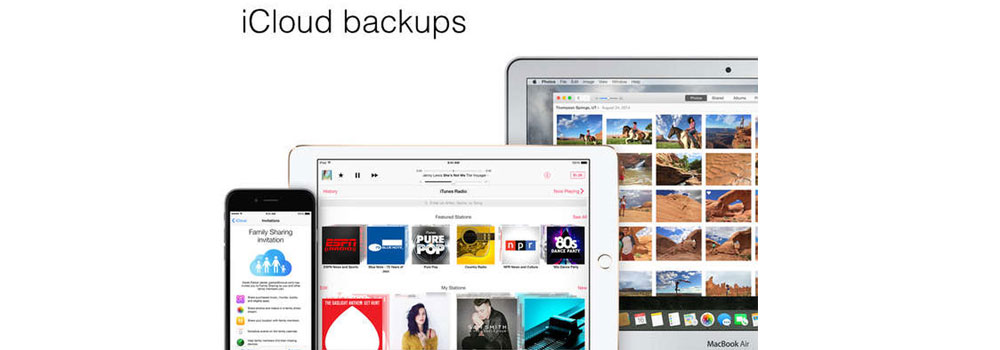
Fortunately for Apple users, iCloud backups help backup everything to an online database. This means that all of your contacts, passwords, pictures, videos and other related data are always safe. Moreover, all of this is secured through encryption.
For users with iOS devices who wish to back up their data, iTunes also offers the ability to perform encrypted backups. The process is very simple and helps avoid the possibility of data loss. These backups usually include Wi-Fi settings, web browsing history, passwords and even user activity.
Both iCloud and iTunes backups are separate processes. While backing up on the cloud means automatic data encryption, the feature has to be enabled on iTunes. With iTunes, users are storing their backups on a physical device such as their computer. iCloud backups happen on the internet.
Backing up on iCloud
To create a backup of your device on iCloud, a few simple and easy steps can be performed. The advantage here is that chances of data loss on the cloud are extremely low. Backups on iCloud are also automatically encrypted, which ensures complete protection of your sensitive data.
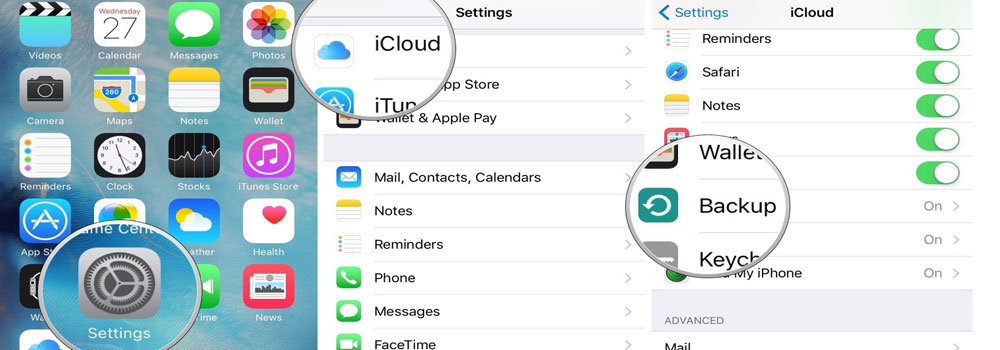
Also, iCloud backups happen automatically. The user only has to enable the option of automatic backups once. Follow the below steps to backup on iCloud:
- Make sure your iOS device is connected to a Wi-Fi network.
- Go to settings à iCloud à
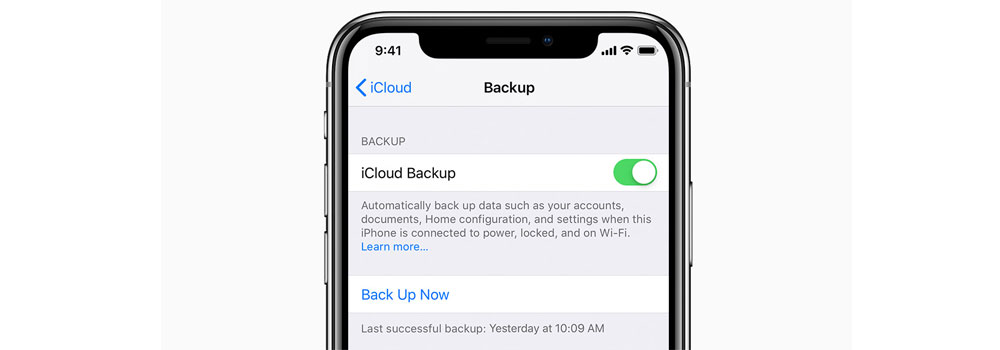
- Check if iCloud Backup is enabled. If it isn’t, change the option to turn it on.
- Once turned on, tap the ‘Backup now’ option.
- You can check the backup by going to settings à iCloud à Storage à Manage Storage. Here, you can check and select your device. The iOS will also list your latest backups.
Backing up on iTunes
Unlike cloud storage, iTunes backups are transferred to a PC or a MAC. This can present an issue of storing your data to a physical storage system. In case of any damage to the system, data loss can occur.
However, the process is still reliable and secure. The backup transferred on your PC or MAC can be encrypted. But users will manually have to turn encryption on. Users will also need to make sure the iOS device can communicate with the computer. Either a USB cable or a Wi-Fi connection will be required.
Once connected to a computer, the below written steps will start the backup process:
- Open iTunes on your device.
- Once the device is connected, a page will automatically appear on your computer screen.
- To encrypt your backups, an option will need to be enabled to encrypt backups. Make sure it’s enabled.
- Once you enable the encrypt backup option, the page will ask to set an encrypted backup password. Make sure the password is strong and secure, so no unwanted user can hack it.
- Now, locate the summary page on the left tab. Now, select File à Devices à Backups or click ‘Backup Now’.
That’s it. Once these steps are followed, the backup process will start.
In the near future if you forget your password and wish to reset it, you can follow the below steps to reset:
- On your iOS device, go to Settings à General à Reset
- Select the ‘Reset all’ option and then enter the new password
- From here, just follow the steps as mentioned on your device. Keep in mind that resetting the password also changes your settings like display brightness, screen layout and wallpaper.
Playing it smart with your iOS Backup Plan
It’s not enough to have a simple encryption option turned on for your data to be safe. A number of scenarios can occur that can still result in a loss of data.
Such as, your iTunes backup on your computer can be lost if the computer is damaged. This is why it’s important to keep multiple backups. This ensures that if one copy of an important file is lost, it still exists somewhere else.
Having a smart backup plan only ensures safety for your data. This is why even your encrypted data should be accounted for.
A Complete Guide for Encrypted Backups through iCloud and iTunes


